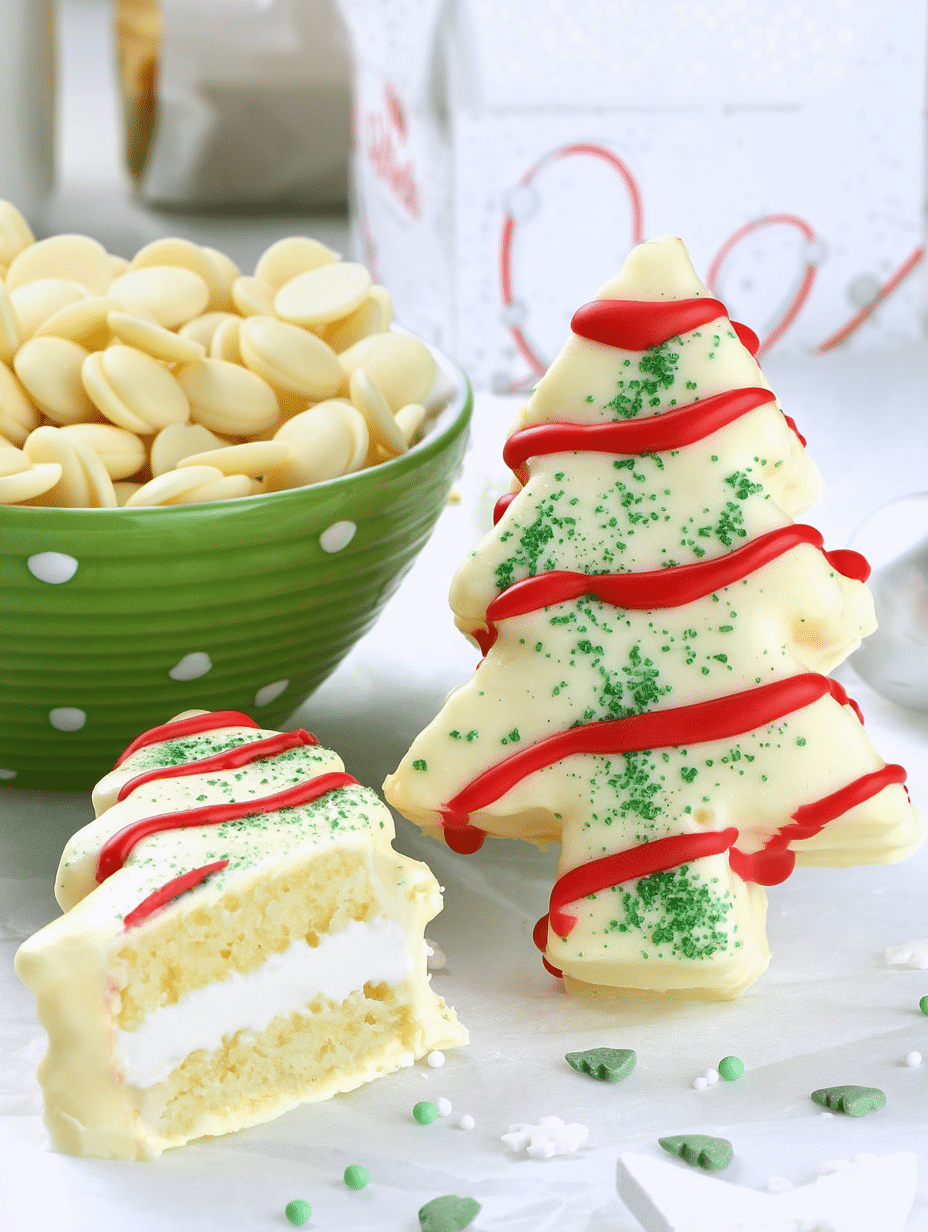
These homemade Christmas Tree Cakes are a festive holiday dessert inspired by the classic Little Debbie Christmas Tree Cakes. They feature two thin layers of soft vanilla cake sandwiched around a fluffy marshmallow cream filling, then cut into adorable tree shapes and covered in a sweet white candy coating. Green sprinkles and red icing give each little cake its traditional Christmas look. Although they take a little time to prepare, these homemade Christmas Tree Cakes are a fun baking project for the holiday season and make a beautiful addition to Christmas dessert platters, cookie exchanges, and family celebrations.
Why You’ll Love These Homemade Christmas Tree Cakes
- A nostalgic holiday treat: These homemade cakes are inspired by the familiar Little Debbie Christmas snack cakes, making them a fun dessert to recreate at home.
- Soft cake and fluffy filling: Thin vanilla cake layers surround a creamy filling made with whipped cream, powdered sugar, vanilla, and marshmallow fluff.
- Festive decorations: White candy coating, green sprinkles, and red icing create the recognizable Christmas tree appearance.
- Perfect individual portions: Cutting the layered cake with a tree-shaped cookie cutter creates individual mini cakes that are easy to serve.
- Great for holiday gatherings: These little cakes look lovely on Christmas dessert tables and make a fun homemade treat to share.
Christmas Tree Cakes Ingredients
This recipe uses a vanilla cake mix, a homemade marshmallow cream filling, and a few simple decorating ingredients.
For the Cake
- Vanilla or yellow cake mix: One box provides the base for the soft cake layers. Prepare it using the ingredients listed on the package.
- Eggs: The recipe calls for 3 eggs as part of the cake mix preparation.
- Water: One cup is used to prepare the cake batter.
- Oil: The cake mix requires ¼ cup of oil.
For the Filling
- Heavy whipping cream: Creates the light, fluffy base of the filling when whipped.
- Powdered sugar: Adds sweetness and helps create a smooth filling.
- Vanilla extract: Gives the filling a warm vanilla flavor.
- Marshmallow fluff: Adds the marshmallow flavor and creamy texture that makes these cakes especially delicious.
For the Decoration
- White candy coating or almond bark: Creates the sweet outer coating around each mini cake.
- Shortening: Helps thin the melted candy coating so it’s easier to dip the cakes.
- Store-bought red icing: Used to decorate the finished trees.
- Green sprinkles or green sanding sugar: Adds a festive green decoration to each cake.
Helpful Tips for Making Christmas Tree Cakes
These homemade Christmas cakes have several preparation and decorating stages. A little planning makes the process easier.
1. Prepare the baking pans properly. Grease both 12×17-inch rimmed sheet pans with baking spray and line the bottoms with parchment paper. This helps the thin cake layers release more easily.
2. Cool the cake completely. Allow both cake layers to cool completely in their pans before adding the filling. Working with warm cake can affect the whipped cream filling.
3. Whip the filling in stages. First beat the heavy whipping cream, powdered sugar, and vanilla until soft peaks form. Then add the marshmallow fluff and continue beating until stiff peaks form.
4. Give the filled cake enough chilling time. Refrigerate the assembled cake for 2–3 hours or preferably overnight. This helps the layers and filling set before cutting.
5. Freeze before dipping. After cutting out the trees and smoothing the sides, freeze them for at least 60–90 minutes. This makes handling the mini cakes easier during coating.
6. Work gently when dipping. These little cakes can crumble or fall apart, so use two forks to flip and lift them carefully. Tap the fork gently against the bowl to remove excess coating.
7. Add the sprinkles immediately. The coating hardens quickly because the cakes are cold. Sprinkle the green decorations over each cake while the coating is still wet.
How to Make Christmas Tree Cakes
Making these homemade Christmas Tree Cakes involves preparing thin cake layers, adding the marshmallow filling, cutting out tree shapes, and decorating each cake.
Step 1: Prepare the Baking Pans and Oven
Grease two 12×17-inch rimmed sheet pans with baking spray and line the bottoms with parchment paper.
Preheat the oven to 350°F.
Preparing the pans before mixing the cake batter makes it easier to divide the mixture evenly.
Step 2: Prepare the Cake Batter
Prepare the vanilla or yellow cake mix according to the package directions, using the required ingredients.
The supplied recipe lists 3 eggs, 1 cup of water, and ¼ cup of oil.
Divide the cake mixture evenly between the two prepared pans and smooth the tops.
Step 3: Bake the Cake Layers
Bake the cakes for about 10 minutes, or until the centers spring back when gently touched.
Remove the pans from the oven and allow the cake layers to cool completely in the pans.
Step 4: Make the Marshmallow Cream Filling
In a mixing bowl, beat the heavy whipping cream, powdered sugar, and vanilla extract until soft peaks form.
Add the marshmallow fluff and continue beating until stiff peaks form.
The finished filling should be fluffy enough to spread between the cake layers.
Step 5: Assemble the Cake Layers
Spread the filling in a thin, even layer over one of the cooled cakes.
Invert the second cake layer from its pan and place it on top of the filling. Carefully peel away the parchment paper.
Transfer the assembled cake to the refrigerator and chill for 2–3 hours or preferably overnight.
Step 6: Cut Out the Christmas Trees
Once the cake is chilled and set, use a 3- or 4-inch tree-shaped cookie cutter to cut out the mini cakes.
Arrange the cut cakes on a tray.
Use a knife or icing spatula to smooth the exposed whipped cream filling along the sides of each cake.
Step 7: Freeze the Mini Cakes
Place the tray of cut-out cakes in the freezer for at least 60–90 minutes.
This step helps the cakes become firm enough to handle during the dipping process.
Step 8: Melt the Candy Coating
When you’re ready to decorate, melt the white candy coating or almond bark according to the package directions.
Stir in the shortening to thin the melted coating.
Prepare another tray by lining it with parchment paper, then remove the cakes from the freezer.
Step 9: Dip the Christmas Tree Cakes
Using two forks, carefully dip each frozen cake into the melted candy coating.
Use the forks to flip and lift each cake, allowing the excess coating to drip back into the bowl.
Tap the fork gently against the edge of the bowl to remove excess coating, then transfer the cake to the prepared parchment-lined tray.
Handle the cakes very gently during this step because the layers may crumble or fall apart.
Step 10: Decorate the Trees
While the white coating is still wet, sprinkle each tree with green sprinkles or green sanding sugar.
The coating will harden quickly because the cakes are cold, so add the sprinkles immediately.
Finally, decorate each Christmas tree cake with store-bought red icing.
Christmas Tree Cakes Decorating Ideas
The original decoration uses white candy coating, green sprinkles or sanding sugar, and red icing. You can arrange these decorations to give each little cake its festive appearance.
- Green sanding sugar: Use green sanding sugar instead of sprinkles for a different decorative finish.
- Green sprinkles: Sprinkle them over the wet white coating to create the traditional Christmas tree look.
- Red icing: Add the red decoration after the white coating has hardened.
For a homemade Christmas dessert platter, arrange the finished trees together with other festive treats.
What to Serve with Christmas Tree Cakes
These Christmas Tree Cakes are ideal for Christmas dessert tables, holiday parties, family gatherings, and cookie exchanges.
Arrange them on a decorative serving platter to show off their tree shapes and colorful decorations. Their individual portions also make them convenient for guests to pick up and enjoy.
They can be served alongside other homemade Christmas cookies and festive desserts for a varied holiday dessert spread.
Frequently Asked Questions
Can I make Christmas Tree Cakes ahead of time?
Yes. This recipe already includes several make-ahead chilling stages. The assembled cake needs to chill for 2–3 hours or preferably overnight before cutting, followed by at least 60–90 minutes in the freezer before coating.
Why do I need to freeze the cakes before dipping?
Freezing the cut-out cakes helps make them firm enough to handle during dipping. It is particularly important because the soft cake layers and whipped cream filling can crumble or fall apart if handled too roughly.
Can I use yellow cake mix instead of vanilla cake mix?
Yes. The recipe specifically allows either vanilla or yellow cake mix.
How do I stop the cakes from falling apart during dipping?
Make sure the assembled cake has chilled for the recommended time and the cut-out trees have been frozen for at least 60–90 minutes. Use two forks to lift and flip each cake, handling them gently throughout the process.
What can I do with the leftover cake pieces?
Don’t throw away the leftover cake after cutting out the trees! The recipe suggests crumbling the remaining cake and rolling it into truffles for another homemade dessert.
Storage and Make-Ahead Tips
Plan the chilling time: The assembled cake needs 2–3 hours in the refrigerator or preferably overnight before cutting. Allow another 60–90 minutes for freezing before coating.
Prepare the decorations: Have the melted candy coating, shortening, green sprinkles, and red icing ready before removing the cakes from the freezer.
Handle carefully: Keep the cakes firm during the dipping process and avoid handling them more than necessary.
Store the finished cakes: Because the filling contains heavy whipping cream, keep the finished cakes refrigerated in a suitable covered container.
Final Thoughts
These homemade Christmas Tree Cakes are a fun way to bring a nostalgic holiday favorite into your own kitchen. With soft vanilla cake, fluffy marshmallow filling, a sweet white coating, and festive red and green decorations, they’re sure to look beautiful on your Christmas dessert table. Take your time with the chilling and dipping steps, and enjoy making these adorable mini cakes for the holiday season!
Print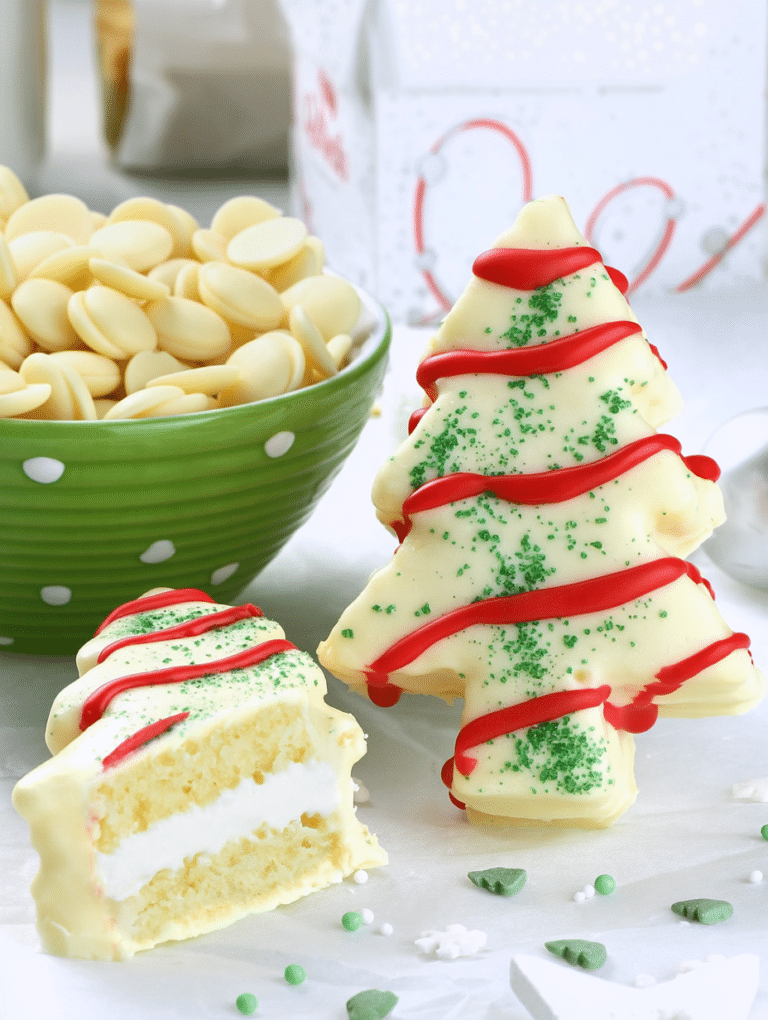
Christmas Tree Cakes Recipe (Homemade Little Debbie Christmas Trees)
These homemade Christmas Tree Cakes are festive mini layer cakes inspired by a classic holiday snack. Soft vanilla cake layers are filled with fluffy marshmallow whipped cream, cut into tree shapes, dipped in white candy coating, and finished with green sprinkles and red icing.
- Total Time: 1 hour 10 minutes, plus chilling and freezing time
- Yield: 15-20 mini cakes
Ingredients
Cake
- 1 box vanilla or yellow cake mix
- Ingredients listed on the box (3 eggs, 1 cup water, ¼ cup oil)
Filling
- 1 cup heavy whipping cream
- ⅓ cup powdered sugar
- 1 teaspoon vanilla extract
- ⅓ cup marshmallow fluff
Decoration
- 16 oz. white candy coating or almond bark
- 2 tablespoons shortening
- Store-bought red icing
- Green sprinkles or green sanding sugar
Instructions
- Grease two 12×17-inch rimmed sheet pans with baking spray and line the bottoms with parchment paper.
- Preheat the oven to 350°F.
- Prepare the cake mix according to the package directions.
- Divide the cake mixture evenly between the prepared pans and smooth the tops. Bake for about 10 minutes, or until the cakes spring back in the center when touched. Cool completely in the pans.
- To make the filling, beat the heavy whipping cream, powdered sugar, and vanilla extract until soft peaks form. Add the marshmallow fluff and continue beating until stiff peaks form.
- Spread the filling in a thin layer over one cake layer. Invert the second cake layer from its pan on top of the filling and peel off the parchment paper.
- Chill in the refrigerator for 2-3 hours, or preferably overnight.
- Once the cake is cooled and set, use a 3- or 4-inch cookie cutter to cut out tree shapes. Arrange them on a tray. Use a knife or icing spatula to smooth the whipped cream along the sides of the cakes.
- Freeze the cakes for at least 60-90 minutes before coating.
- When ready to decorate, melt the candy coating or almond bark according to the package directions. Stir in the shortening to thin the coating.
- Line a tray with parchment paper and remove the cakes from the freezer. Dip each cake into the candy coating using two forks to flip and lift it. Tap a fork gently on the edge of the bowl to release excess coating, then place the cake on the prepared tray. Handle gently because the cakes may crumble or fall apart.
- While the coating is still wet, sprinkle each tree with green sprinkles or green sanding sugar. The coating will harden quickly because the cakes are cold.
- Finish decorating with red icing.
Notes
- After cutting out the tree shapes, crumble the leftover cake pieces and roll them into truffles.
- Chill the assembled cake layers for 2-3 hours or preferably overnight before cutting.
- Freeze the cut-out cakes for at least 60-90 minutes before dipping to help them hold their shape.
- Handle the cakes gently when dipping, as they can crumble or fall apart.
- Add the green sprinkles while the candy coating is still wet because it hardens quickly on the cold cakes.
- Prep Time: 1 hour
- Cook Time: 10 minutes
- Category: Dessert, Cakes
- Method: Baking
- Cuisine: American