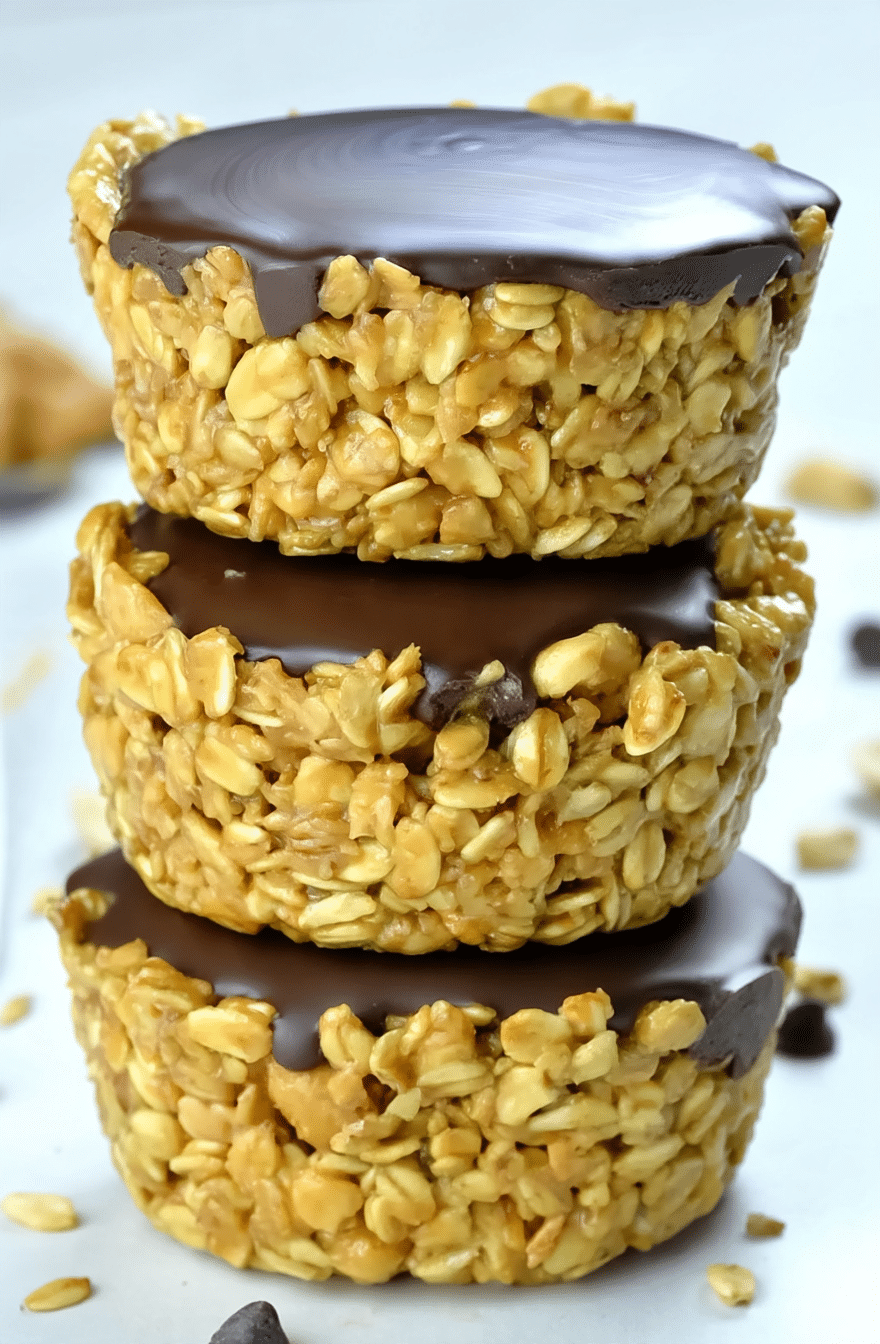
No-bake peanut butter granola cups are a simple way to enjoy crunchy granola, creamy peanut butter, honey, and rich dark chocolate in one convenient treat. With no oven required and just 10 minutes of preparation time, these homemade cups are a practical option for busy mornings, lunchboxes, or an afternoon snack.
Each cup has a granola-and-peanut base, a smooth peanut butter center, and a chocolate topping that sets in the refrigerator. The ingredients come together in layers, creating a combination of crunchy, creamy, and chocolatey textures. Because the cups need chilling rather than baking, they are also a useful recipe to prepare when you want a homemade snack without heating up the kitchen.
Why You’ll Love These Peanut Butter Granola Cups
- No baking required: Prepare the cups using a mixing bowl, a cupcake pan, and a freezer or refrigerator.
- Simple pantry ingredients: Granola, peanuts, peanut butter, honey, dark chocolate, and coconut oil make up the recipe.
- Convenient individual portions: The recipe makes 12 cups, making them easy to portion for snacks or lunchboxes.
- A layered texture: Crunchy granola and chopped peanuts contrast with the smooth peanut butter filling and chocolate topping.
- Easy to prepare ahead: The cups can be stored in an airtight container in the refrigerator or frozen for longer storage.
No-Bake Peanut Butter Granola Cups Ingredients
The quantities below follow the supplied recipe card.
- Granola: Forms the crunchy base and gives each cup its texture.
- Chopped peanuts: Add more crunch and a stronger peanut flavor.
- Peanut butter: Helps bind the granola mixture and provides the creamy center.
- Honey: Adds sweetness and helps the granola mixture stick together. The original recipe allows additional honey if needed.
- Dark chocolate: Creates the chocolate topping for each cup.
- Coconut oil: Is melted with the chocolate to make the topping.
The recipe uses peanut butter in both the granola base and the filling, so measure these portions separately. The filling uses melted peanut butter, while the topping combines dark chocolate with coconut oil.
Helpful Tips for Making Granola Cups
Make sure the granola mixture sticks together. Combine the granola, chopped peanuts, peanut butter, and honey thoroughly. If the mixture feels too dry to hold its shape, add more honey as directed in the recipe.
Press the base firmly into the pan. Divide the mixture among 12 cupcake cups and press it down well. Creating a small dent in the center leaves room for the peanut butter filling.
Chill between layers. Freeze the granola bases for 5–10 minutes until firm before adding the filling. After adding the melted peanut butter, freeze them for another 5–10 minutes. These chilling steps help the layers stay in place.
Wait for the chocolate to set. Spoon the melted chocolate and coconut oil over the peanut butter filling, then chill the cups until the topping has set.
Use an airtight container. Store the finished cups in the refrigerator or freeze them for longer storage, as specified in the recipe notes.
How to Make No-Bake Peanut Butter Granola Cups
Step 1: Prepare the granola mixture
In a bowl, combine 2 ½ cups granola, 1 cup chopped peanuts, 3 tablespoons peanut butter, and 3 tablespoons honey. Mix until everything is combined. If the mixture is too dry, add more honey until it becomes sticky enough to hold together.
Step 2: Shape and chill the cups
Grease a cupcake pan and divide the granola mixture among 12 cups. Press the mixture firmly into each cup, making a dent in the center. Freeze for 5–10 minutes, or until the cups are firm.
Step 3: Add the peanut butter filling
Melt 1 cup peanut butter and pour it into the center of each granola cup. Return the pan to the freezer for another 5–10 minutes, until the filling is firm.
Step 4: Prepare the chocolate topping
Melt 12 ounces of finely chopped dark chocolate with 1 tablespoon coconut oil. Spoon the melted chocolate over the peanut butter filling in each cup.
Step 5: Chill until set
Chill the granola cups until the chocolate topping has set. Store the finished cups in an airtight container in the refrigerator, or freeze them for longer storage.
Serving Suggestions
These peanut butter granola cups work well as an individual snack or as part of a simple breakfast. Their portable shape makes them convenient for lunchboxes, busy mornings, or an afternoon treat at home.
You can also arrange them on a dessert plate when serving a selection of small homemade treats. Keep them chilled until you’re ready to serve so the chocolate topping stays set.
Frequently Asked Questions
Can I make peanut butter granola cups without baking?
Yes. This recipe is entirely no-bake. The granola bases and peanut butter filling are firmed in the freezer, while the chocolate topping sets during chilling.
Why is my granola mixture too dry?
The granola mixture needs to be sticky enough to hold its shape when pressed into the cupcake pan. The original recipe recommends adding more honey if the mixture is too dry.
How do I keep the granola cups from falling apart?
Combine the ingredients thoroughly, press the mixture firmly into the pan, and chill the bases for 5–10 minutes until firm before adding the filling.
Can I freeze these peanut butter granola cups?
Yes. The recipe notes recommend storing the finished cups in the freezer for longer storage. The supplied recipe does not specify an exact freezer storage duration.
How should I store the finished cups?
Keep them in an airtight container in the refrigerator. The recipe also allows freezing them for longer storage.
A Simple No-Bake Snack to Keep on Hand
These no-bake peanut butter granola cups bring together crunchy granola, creamy peanut butter, honey, and dark chocolate in convenient individual portions. With simple ingredients and no oven required, they’re an easy homemade snack to prepare ahead and keep chilled for busy days.
Save this recipe for the next time you want a simple, chocolate-topped peanut butter treat.
Print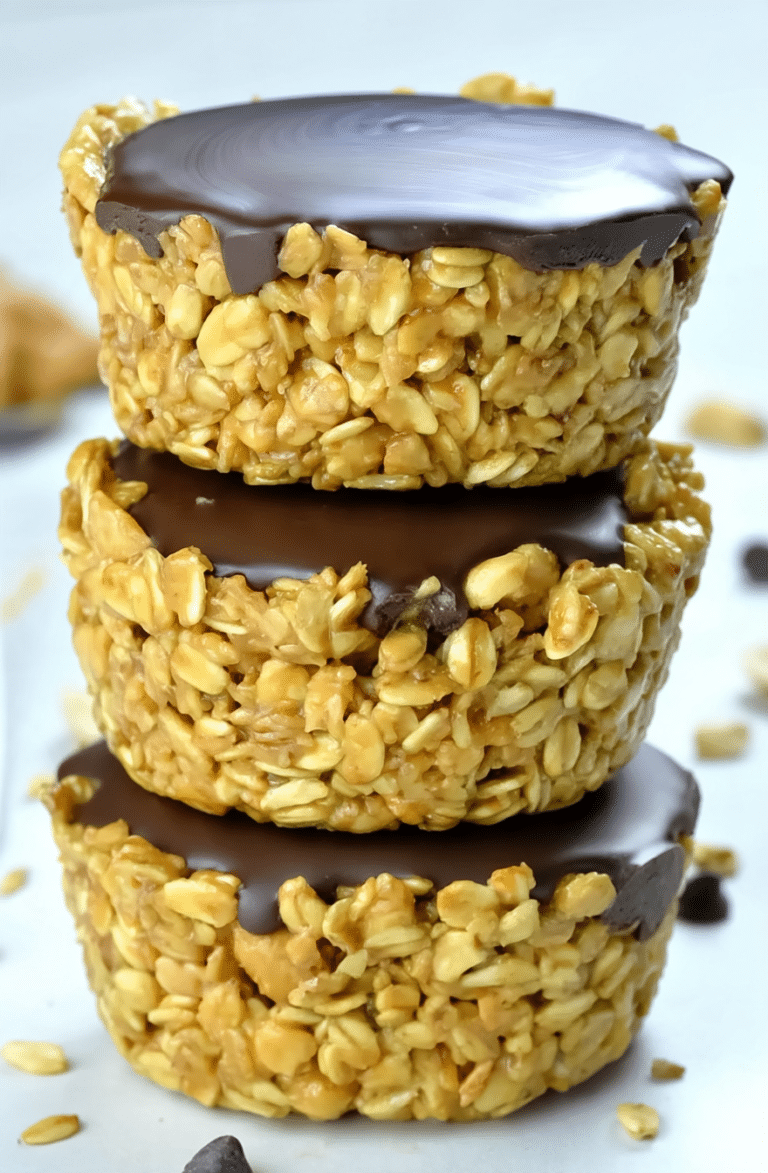
No-Bake Peanut Butter Granola Cups with Chocolate
No Bake Peanut Butter Granola Cups are an easy grab-and-go snack made with crunchy granola, chopped peanuts, peanut butter, and honey, filled with creamy melted peanut butter and topped with dark chocolate. These no-bake cups are perfect for lunch boxes, quick breakfasts, or a sweet snack.
- Total Time: 10 minutes
- Yield: 12 cups
Ingredients
- 2 1/2 cups granola
- 1 cup peanuts, chopped
- 3 Tablespoons peanut butter
- 3 Tablespoons honey, or more if needed
Filling
- 1 cup peanut butter, melted
Topping
- 12 oz. dark chocolate, finely chopped
- 1 Tablespoon coconut oil
Instructions
- In a bowl, combine the granola, chopped peanuts, peanut butter, and honey. If the mixture is too dry, add more honey until it reaches a sticky consistency.
- Grease a cupcake pan and divide the mixture among 12 cups. Press the mixture firmly into each cup and make a dent in the center. Freeze for 5–10 minutes, until the cups are firm.
- Melt the peanut butter and pour it into the center of each granola cup. Freeze for another 5–10 minutes, until firm.
- Melt the dark chocolate and coconut oil together. Spoon the melted chocolate over the peanut butter filling.
- Chill until the chocolate has set.
- Store in an airtight container in the refrigerator, or freeze for longer storage.
Notes
- Add extra honey if needed to help the granola mixture hold together.
- Press the granola mixture firmly into the cupcake pan so the cups hold their shape.
- Freeze the granola base and peanut butter filling until firm before adding the next layer.
- Store in an airtight container in the refrigerator or freeze for longer storage.
- Recipe adapted from Foodies of South Africa.
- Prep Time: 10 minutes
- Cook Time: 0 minutes
- Category: Snack
- Method: No Bake
- Cuisine: American